|
M25/648 dieselturbo 1
Tools
- Torque wrench
- Protractor
- Tightening tool with long handle
- Various spanners etc.
You need
- Head gasket
- Antifreeze
- Oil
And maybe
- Top cover gasket
- Gaskets for the manifolds
- Gasket for the exhaust
- Stop washers for the valve lifters
- Water pump
- Drive belts
- Oil filter
|
|
|
Replacing the head gasket on the diesel engine is not that difficult;
except that it takes GREAT muscle strength to tighten the bolts. But it is a
lot of work, so you should take your time, and also overhaul
the top when you have it dismantled anyway, and flatten it (if needed) and
possibly get it pressure tested.
You may also consider replacing the water pump and installing new
drive belts. Maybe you should also put on a new top cover gasket,
and put new gaskets on the manifolds and exhaust.
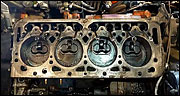
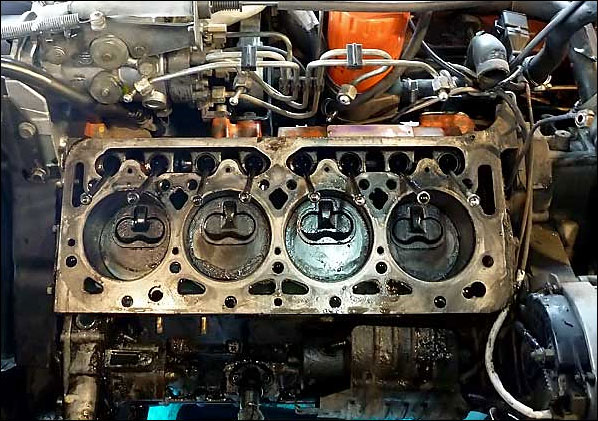
Here we see that coolant has come in at 3 and 1, and a little
at 2. Only 4 (far left) looks good.
|
|
|
• Do not rotate the engine when the top is not mounted.
• It is discussed whether it is necessary to change to new
bolts when installing (Citroën recommends new ones). If you use
the old ones, make sure the threads are perfectly clean and free of damage.
• The top and head gasket of the diesel turbo 2 can also be used on the diesel turbo 1.
|
|
|
Dismantling the top
• The engine must be completely cold before removing the top.
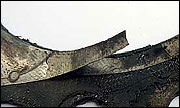
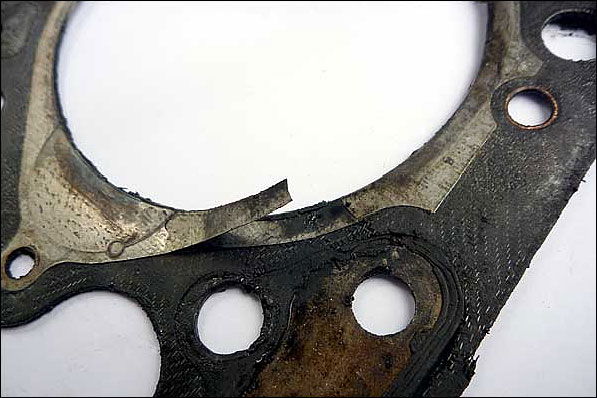
The head gasket can appear to be okay, but there may be cracks in the metal.
|
|
- Put the car on jacks or on a pit.
- Disconnect the battery.
- Cover the alternator with plastic.
- Remove the radiator: Unplug the power plug, disconnect the 2 thick hoses from the water pump,
loosen the 2 fasteners at the top and lift out carefully.
- Remove the grill and fans.
- Remove the hose that runs between the air filter, the turbo and the top cover.
- Unscrew the cover over the drive belts, remove the idler pulley, loosen the alternator, and remove the belts from the water pump.
- Disconnect the cold start regulator.
- Disconnect the diesel injection (4 nuts).
- Disconnect the 4 hoses (1 thin on the air manifold, 3 thick at the back/right).
- Disconnect the wires: 2 to pull off, 1 connector, 1 wire to the glow plugs, 1 ground (remove the metal hoop).
- Unscrew the tube on the air manifold (2 bolts and pull up) and unscrew the air manifold.
- Turbo: Disconnect oil intake (it's hard to get to the rear allen key; hold the allen key in your
left hand and stick your hand in behind and use your right hand thumb and forefinger to get
the allen key in place). Disconnect oil outlet.
- Unscrew the exhaust manifold (8 nuts, 4 nuts on the exhaust pipe, 1 bolt on the bracket).
- Unscrew the top cover.
- Unscrew the valve lifters.
- Remove the push rods.
- With a COMPLETELY cold engine: Unscrew the top by loosening the bolts in reverse order (17—1).
|
|
You can make yourself a tool to unscrew the allen bolts on the oil supply to the turbocharger:
Break an Allen key in a vice and attach one piece into a 6mm wrench.
Then use an Allen key intended to screw at an angle.
|
|
|
Preparation for installation
|
|
- Thoroughly clean the surfaces that are in contact with the head gasket.
- Check if the top is level. If it is not, you must get it levelled.
And if you see the slightest hint of cracks, you must have it pressure tested.
- Clean the manifolds and where they connect to the top, as well as the gaskets.
- Clean the bolts if you want to use them again. (Pinch the threads firmly between
a wire brush and a twist dot and screw in and out until the threads are completely shiny.)
- Clean the threads in the block (e.g. take a microfiber cloth on a flat screwdriver and screw down as far as it will go, then up again).
- You can now also do top maintenance.
- If you are going to change the water pump, this is the right time.
|
|
|
|
|
- Attach the head gasket (must go down on two studs).
- Place the top carefully in place.
- Fit the bolts (apply a little engine oil and wipe them well with a cloth first: press
the cloth firmly against the threads and twist). Make sure that the stop discs face the right way (with the claws downwards).
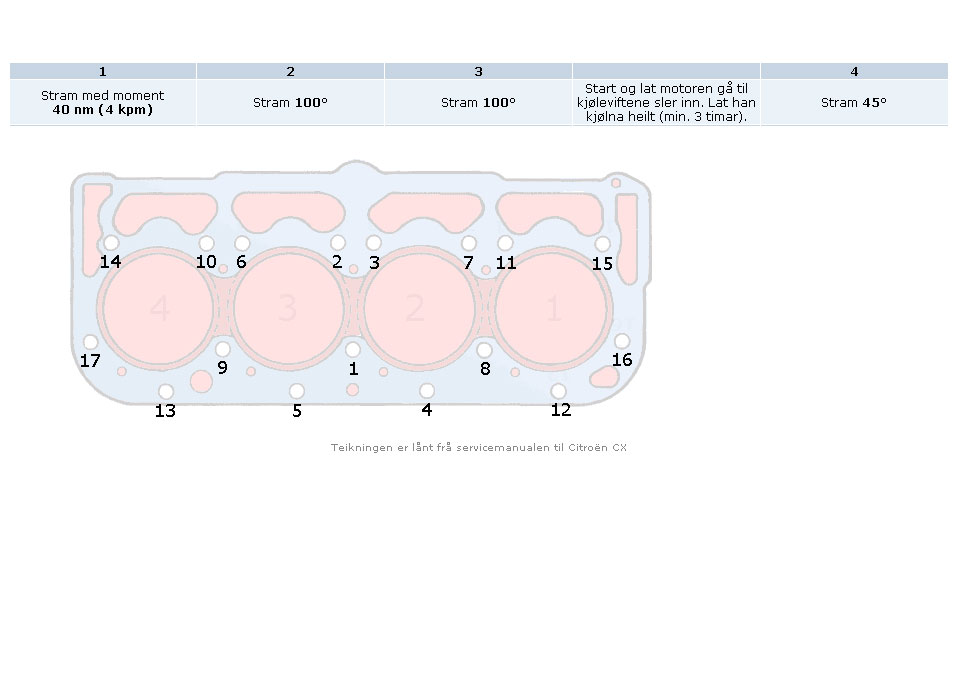
- Screw first with torque, and then with degrees (see the layout below). At the end it becomes very difficult to screw.
- Insert the push rods (check that they are completely straight).
- Install the valve lifters. (This is a tricky job: You have to make sure that the stop washers
don't get jammed and that the push rods end up where they should. Also make sure to fit the
axle correctly: the small holes should face up.)
- Reassemble everything.
- Refill antifreeze.
- Top up or change the oil and fit a new oil filter if necessary.
- Start and run the engine until the fans come on.
- Wait until the engine is COMPLETELY cold again and tighten by degrees (see below).
- Adjust the valves.
|
|
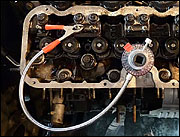
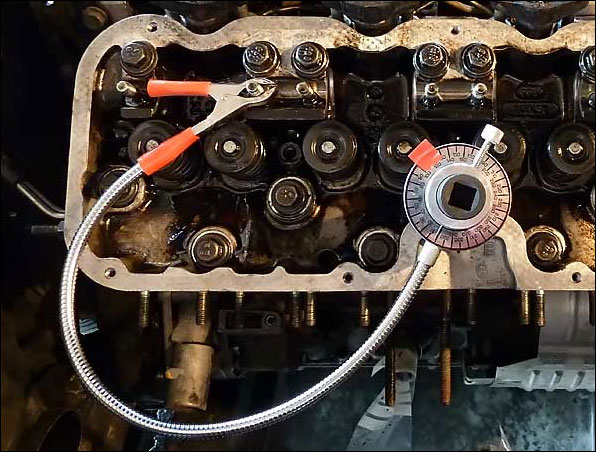
Place a piece of colored tape on the protractor so that it is easier to see where to stop.
|
|


|