Problem
Poor or no suspension at the rear.
Control
Start the car and leave it at normal height.
Grasp the corner of the bumper and lift up. You should now without too much effort be able to lift the rear 15-25cm.
Repeat on the other side.
If the car is stiff, the spheres probably have to be replaced. But it may also be that the swing arms
bearing is bad or destroyed.
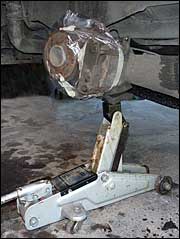
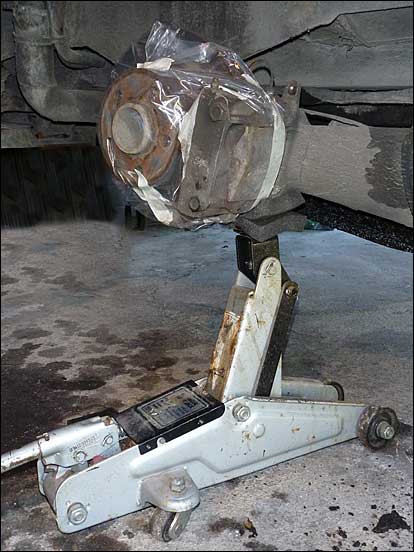
Jacking up the swing arm.
If you do not have a filter wrench with a strap, you can try using a steel strap.
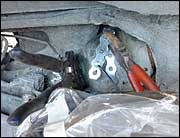
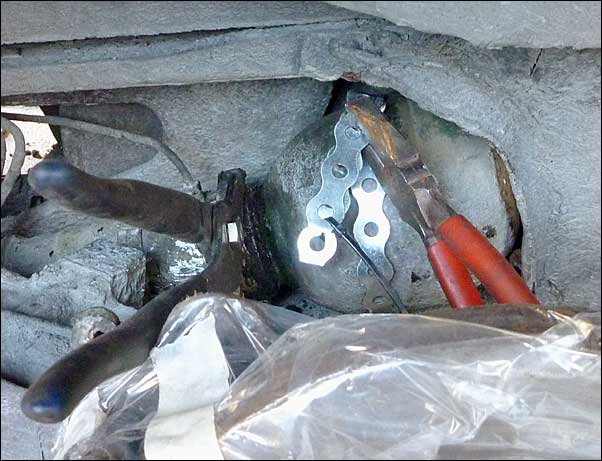
Use a large pair of pliers with rounded jaws to hold the suspension cylinder.
|
|
|
Replacing the spheres
A: Feed pipe B: Overflow return pipe C: Venting pipe
- Lift the car up to the upper position, remove the wheel covers and loosen the wheel nuts on the rear wheels.
- Jack the car up in front (and thus the back), put safety stands under the rear jack points and remove the rear wheels.
- Remove the disc protectors (be careful with the screws; if necessary warm them up and let them get cold again before you try to unscrew them).
- Wrap the brake discs in plastic.
- Clean properly around the spheres (use a scraper / brush / vacuum / compressed air, not water).
- Use a filter wrench (with strap) and unscrew the sphere a few inches. [Instead, you can knock a small
notch in the spheres with a hammer and chisel, set the chisel in the notch and knock till the
spheres has turned up 1-2cm. BUT - remember that the spheres contain gas under pressure; if they crack it will be disaster!]
- Lower the car to the bottom position.
- Put the jack under the swing arms and jack them up (this may take some time). This way you loose the pressure. Remove the jack.
- Lift the swing arms up and down on both sides to see if their bearings are in order (now may be a favorable time to refill grease).
- Blow with compressed air around the front plastic tubes (venting pipes) (C) on each side and pull them out.
- Loosen the hose clamps and press the sphere forwards (with a crowbar) so it is possible to remove them. Tighten the hose clamps again.
You can also put a 8mm metal rod into the hole on the suspension cylinder so it will not turn around.
- Put under something that can collect the LHM and unscrew the spheres and pry them out
(you may need to push the suspension cylinder slightly forward with the crowbar).
- Apply Owatrol (or other rust treatment) on all surfaces around the spheres.
- Remove the old gaskets, put LHM on the new ones, and squeeze them firmly in place
(not on the spheres, but where the spheres are to be screwed in place).
- Put a thin layer of grease on the contact surfaces of the spheres and a thick layer on top (around the knob).
Screw them in place (make sure the gaskets stays in place!).
Tighten as much as you can only with your hands, do not use aids. Loosen the hose clamps.
- Start the engine and set the height adjustment at the top position.
- Check that the spheres have got all the way to the rear (metal to metal,
make sure the knob on top of the ball has got in the middle of the hole) and tighten the hose clamps.
- Put back the plastic tubes (about half inch down).
Tube B is the return tube. It's got a plastic piece on the end. If it's gone, it may sit in the bellows.
In which case you pull it up with a suitable screw. Tube C is ventilation (blow through it with compressed air before you put it back).
- Put back the disc protectors.
- Put on the rear wheels and wheel covers, remove the safety stands and top up the LHM. (Remember to tighten the wheel bolts!)
NB! Remember eye protection!
|
|
Difficult?
Yes. It is difficult both to get out the old spheres, and getting the new ones in place. You must also make sure to work very clean.
• If you want you can take out everything, but that is just as cumbersome:
1 Clean well.
2 Unscrew the pipe (A).
3 Pull out the two plastic pipes (B, C).
4 Unscrew the clamp and pull it out.
5 Pull out the holding pin as you squeeze it together.
6 Jack the suspension arm all the way up (or the arm on the other side, so the jack does not get in the way).
7 Use two tyre levers, push the sphere as far forward as it will go, and bend it out (very difficult if it is a separable sphere).


8 Set the sphere in a vise and use a large pipe pliers with curved jaws to loosen the suspension cylinder.
Place the pliers near the sphere and loosen with a powerful pull.
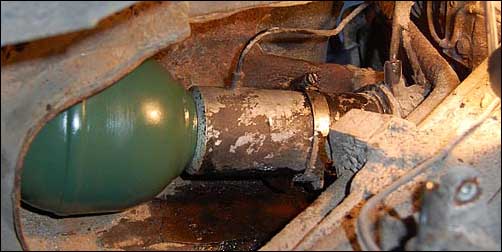
Check the bellows for leaks by putting a finger in front of the vent hole and push the bellows in and out. Fill 25 ml LHM through the same hole.
Put rubber-renewal on the bellows.
The metal bar inside the bellows is completely loose: this is not a fault.
But – it should be attached to the metal thingy at the end of the bellows: Squeeze the bellows flat with two fingers so that
you feel the rod and pull the metal thingy. You know then if the rod is attached to this.
Here we see that the bar has come loose, because the bellows have not contained LHM (rust).
|
|